Thursday, March 31, 2011

A Little Bit of Everything Update


I've been up to a lot lately! I have some new projects coming up that I'm really excited about but can't share yet! I'm still hoping to post the giveaway that I've been meaning to do (hopefully in just a few days) but the past few weeks have been full of distractions! The plus is they've been rather good distractions! Here's a few random neat things:

Won a pretty awesome giveaway on Twitter from @Crafternews, received a ton of neat books!
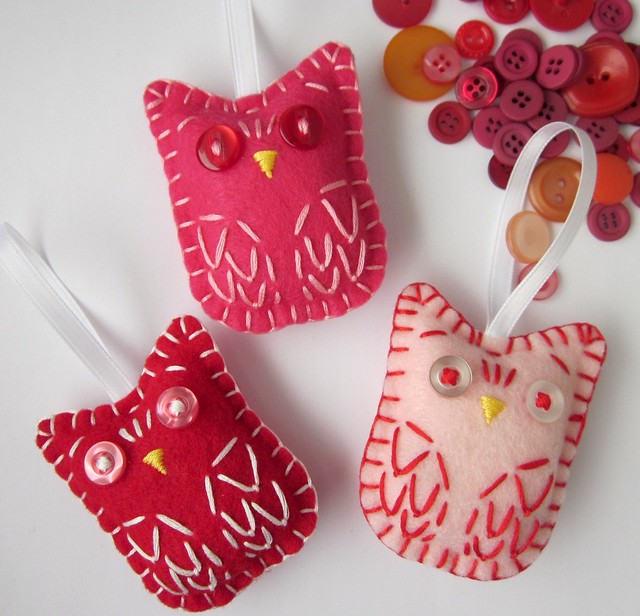
Received some brand new Eco Felt from Kunin!  I'm not sure the new printed Eco Felt by Kunin is available in stores yet so I thought I'd share! It's super fun, I can't wait to try out some new projects with it! It's also super soft, I've seen other printed felt before and well, this new Eco felt is just different! Most I've seen has been almost like a screen print on felt and its rather rough on one side, this new printed Eco felt almost seems woven as it has the same soft felt texture on both the back & printed side. Looking forward to see what other prints come out! I'd love to see some polka dots or ginghams! 
I got married! My new hubby Joe & I decided to just go get hitched & just be married, we tied the knot on Feb. 28th! We've been together a long time and well I'm just not one for big parties but don't get me wrong - I'll totally go to your big party, just didn't want to plan one myself!! However, we did a have a super nice family party last weekend to celebrate! Horray!
Updated the Shop with a Tree Mobile today - I added a sweet little butterfly to this one!

CSNstores.com Review!


 The folks over at CSNStores.com recently provided me with a $75 gift card to do a shopping review! I decided to keep it crafty and get some organizational goodies for my craft lab & a few other random goodies! Of course, I really wanted to get a handbag, but gee whiz - do I really need another handbag? CSNStores.com has many different sites within their site so if you keep shopping around you'll probably find a specialty shop catering to just what you need! So anyhow, here's what I picked up: 


Got a sturdy universal sewing machine case for my little machine! It fit my Brother nicely and was room enough to fit my pedal and extras in the case with it, which was really great! Oh and I should mention, everything came really quickly!!

An ArtBin storage container, which I must confess I haven't used yet but I hope to use it for my more artsy supplies like pencils, markers, & paints! They have a good selection of ArtBin's, it was difficult deciding which one to get!
And more randomly, I got some extra non-stick frying pans by Faberware! They were inexpensive and pretty decent for the price - plus they're red!! Overall the shopping selection was good, the prices were reasonable, & the shipping was fast!
Related Posts Widget for Blogs by LinkWithin

Wednesday, March 23, 2011

Japan Relief Badge! Donate today!

Created this little cutie to support relief efforts in Japan! I will be donating 100% of the sale of these badges to the Red Cross and other organizations supporting relief efforts. Donate today by picking one up here, wear it to spread the love, and let those in Japan know we're thinking of them in their time of need!The badge will be available through the end of April. I'm totally amazed by the courage of the Japanese people and hope many blessings come their way soon! Japanese art & culture has been a continuing inspiration for me and I just want to say thanks!
Related Posts Widget for Blogs by LinkWithin

Flickr Picks: Lova Revolutionary Blog

Featured LR Flickr Pool Member: Between the Lines
Related Posts Widget for Blogs by LinkWithin

Tuesday, March 22, 2011

Shop Update!

Shop Update! Added a few new Owl & Bird Keychains to the shop yesterday! I have a few brand new goodies on the way very, very soon so be sure to check in! I'll also be announcing a Giveaway on Thursday!!! Stop by to enter and check out what awesome LR goodies you'll have a chance to win!  
Related Posts Widget for Blogs by LinkWithin

Monday, March 21, 2011

DIY Tutorial : Framed Embroidery Hoops

Related Posts Widget for Blogs by LinkWithinHey Friends! Just wanted to share with you today a how-to on Framed Embroidery Hoops! Framed Embroidery Hoops are every where, they make great gifts, wall art, and a perfect way to show off your embroidery! I'm sure most methods are quite similar but I haven't seen anyone back their hoops like I do so I thought I'd teach you how! 

Adding a little piece of backing fabric helps to create a little finished piece of art work and it's just a nice detail! Plus it really helps to add some sturdiness to your hoop, especially if you're framing a thinner cotton or making patchwork hoops. 


So here we go: 

1. After you've finished up the embroidery you plan to hoop, cut a piece of cotton fabric to fit in your hoop, I usually just use my finished embroidery as a guide for size. You don't often find me measuring things! ;) (thinner fabric works best for backing in this method).  


2. Place your backing fabric front size down on top of your inner hoop, lay your finished embroidery finished size up on top of your backing fabric, and attach your top hoop. 


3. Once you have all your fabrics in place and your hoop tightened down, pull the edges of your backing fabric to get it nice & taunt and then do the same with your embroidered top piece. Tighten down your main hoop once again so everything is snug and in place. 


4. Next trim down your backing fabric so that it is level with your inner hoop. Since everything is snug & in place you won't need to glue this fabric down since your outer fabric will hold it in place just fine. 


5. Then decide whether you need to trim your top fabric - I like mine to just cover the rim of my hoop but not go all the way down to my backing fabric. I just think it looks neater this way. So trim down your remaining edge so it is about a half inch and enough to go over the edge of your hoop. 


6. Time to start gluing! I start from the screw at the top of the hoop and work my way around the circle doing 2 to 3 inches at a time. I like to use good ol' Aleene's Tacky Glue - it's well, very tacky and stays in place great! Be sure you're framing a piece you'd like to stay in the frame because you probably won't be able to remove it easily! 


- I like to do a bead of glue on the very edge of the hoop and then a lighter line of glue on the hoop wall - the glue there I spread out with my finger so you get less glue oozing from the bottom. Begin pressing your fabric down and hold in place for several seconds until the glue starts to bond - keep working all the way around your hoop. You may have a few places that pop back up or some larger folds once you finish but just go back around your hoop smoothing things down and holding for a bit longer if necessary. 

Voila! You've got a nice little finished framed embroidery hoop.


Hope this was helpful! If you have any finished embroidery hoops or other crafty goodness that you'd like to share, post them to the Lova Revolutionary : Blog Pool on Flickr!

Thursday, March 10, 2011

#Winning

Duh! Winning Drink Cozy by knotworkshop
Related Posts Widget for Blogs by LinkWithinHow could I resist doing a Charlie Sheen post? I wouldn't be winning! if I didn't! 

Tiger Blood Pocket Mirror by hownice
Charlie Sheen T-Shirt Medicine Bottle by MachineTees
Charlie Sheen F-18 Tshirt by NIFTShirts 

On the Road...

Jamaica Souvenir Playing Cards by ValintheValley
Hawaii Souvenir Ashtray by MungerBirchwoodINC
Arizona Souvenir Tray by jacklom3
Owl Texas Souvenir Salt & Pepper Shakers by BabylonSisters
Niagara Falls Souvenir Candy Tin by VintageSurplus
Las Vegas Souvenir Hamburger Plate by pollydoodlesco
God Bless Our Camper Plate by GoodandPlenty
Related Posts Widget for Blogs by LinkWithin

Wednesday, March 9, 2011

Yummy Pop

Related Posts Widget for Blogs by LinkWithinI do my best to stay on top of current trends but this one totally slipped past me for some reason...I went to Starbucks today (shame on me) and was offered something I just couldn't refuse - a cake pop! I should have been sticking to my New Years diet but there was just something about a 20 inch picture of a cake pop that spoke to me...like corndogs, popsicles, & lollipops some things just work great on sticks! (and well my drink was soy with no whip so it all balanced out!)
Spring Cake Pops by Bella Bites Cake Pops on Etsy
Then I became totally intrigued by cake pops and started googling them, looking on Etsy, checking for recipes...cake pops are everywhere! How did I not notice them before? Anyhow, I also found a recipe & how-to on Etsy by Bakerella for Cake Pops! Have any of you tried making your own delicious cake pops? I can't wait to try it!

Horray! Goodies from MarthaStewart.com


Related Posts Widget for Blogs by LinkWithinI was super excited to receive an email from one of the editors at MarthaStewart.com recently! I won their Martha Stewart Handmade Valentine's Contest for submitting my Valentine's Owls! I'm not certain there will be any type of announcement on MarthaStewart.com but I'm still stoked - it's just not every day you get an email or goodies direct from the people at Martha Stewart! 
Valentines Edition Owl Ornaments!
 Here's what I won: A neat pad of colorful paper & some paper punches! I'm looking forward to using the punches since I haven't tried any from the Martha Stewart Craft line. I always love all the Martha craft supplies - they always have such a perfect aesthetic and can be used with so many different styles of craft.